PrestaShop
Seamlessly integrate the OPAY payment system with PrestaShop store by following the Installation guide bellow.
Plugin version v1.6.6
Tested with PrestaShop versions:
1.4.0.17 - 1.7.8.9 & 8.1
Before you start
Before installing the OPAY payment system on your website, please ensure that the registration form on the OPAY website has been completed. If you have not registered yet, please do so first. After registration, you will receive the necessary credentials via email (Website ID, Signature Password, and User ID), which are required to proceed with the system integration.
Installation instructions
-
Move OPAY Plugin archive files to the PrestaShop directory. You can do this in several ways.
Here are two options:
Using the PrestaShop administration interface
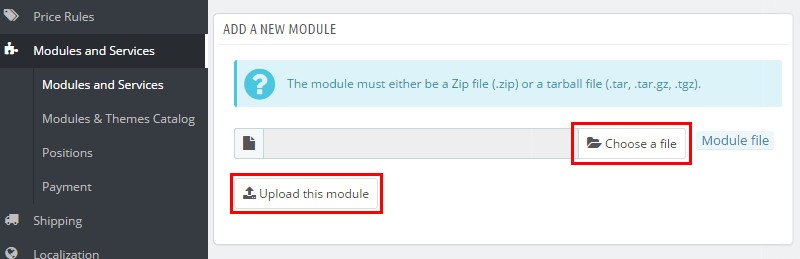
- In the administration environment, go to Modules->Modules and services and click on Add a new module.
-
Select the OPAY Prestahop plugin zip archive and click on Upload this module.
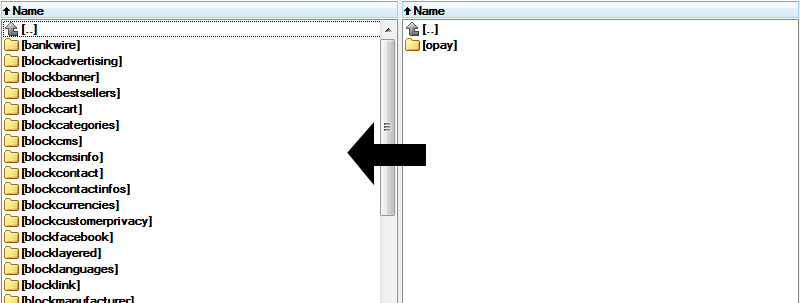
Using an FTP client program:
-
Extract the contents of the OPAY plugin zip archive. Using an FTP client program, upload the extracted files to the PrestaShop plugins directory (modules).
-
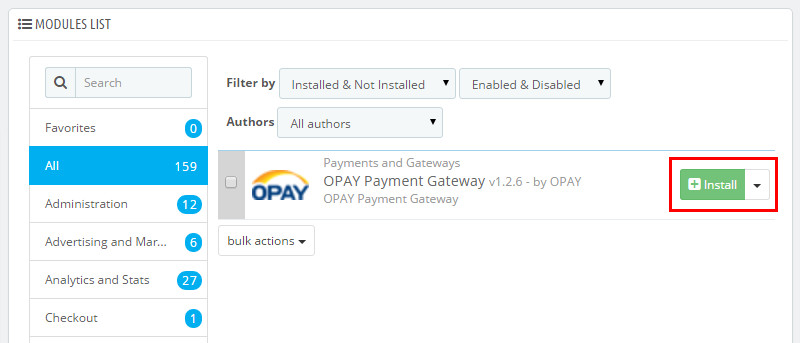
In the Modules List, click on Install next to the OPAY Payment Gateway plugin.
-
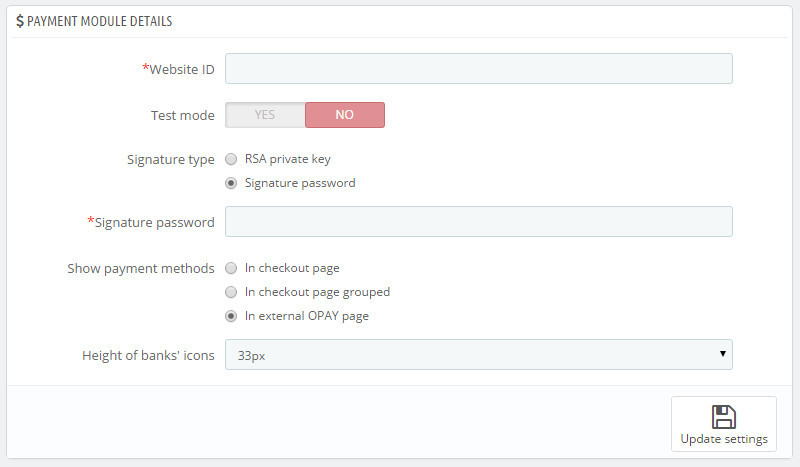
Fill in the mandatory Payment Module details and click on Update Settings. If your online store is not registered with the OPAY system, fill out the registration form and receive all the necessary data for the settings.
- Accept payments!
Payment page customization
Customizing the payment page to match your brand’s style can significantly enhance the customer experience. We highly recommend doing so, as a branded payment page builds trust, strengthens the sense of security, and helps reduce cart abandonment.
Customization is quick and easy via the Payment Pages menu in the OPAY self-service portal. You can choose between two design styles, apply your brand color, upload a logo, and preview changes instantly.