Eshoprent plugin
Seamlessly integrate the OPAY payment system with Eshoprent store by following the Installation guide bellow.
Installation instructions
Here is a description of how to install OPAY in your online store created on the eshoprent.com platform.
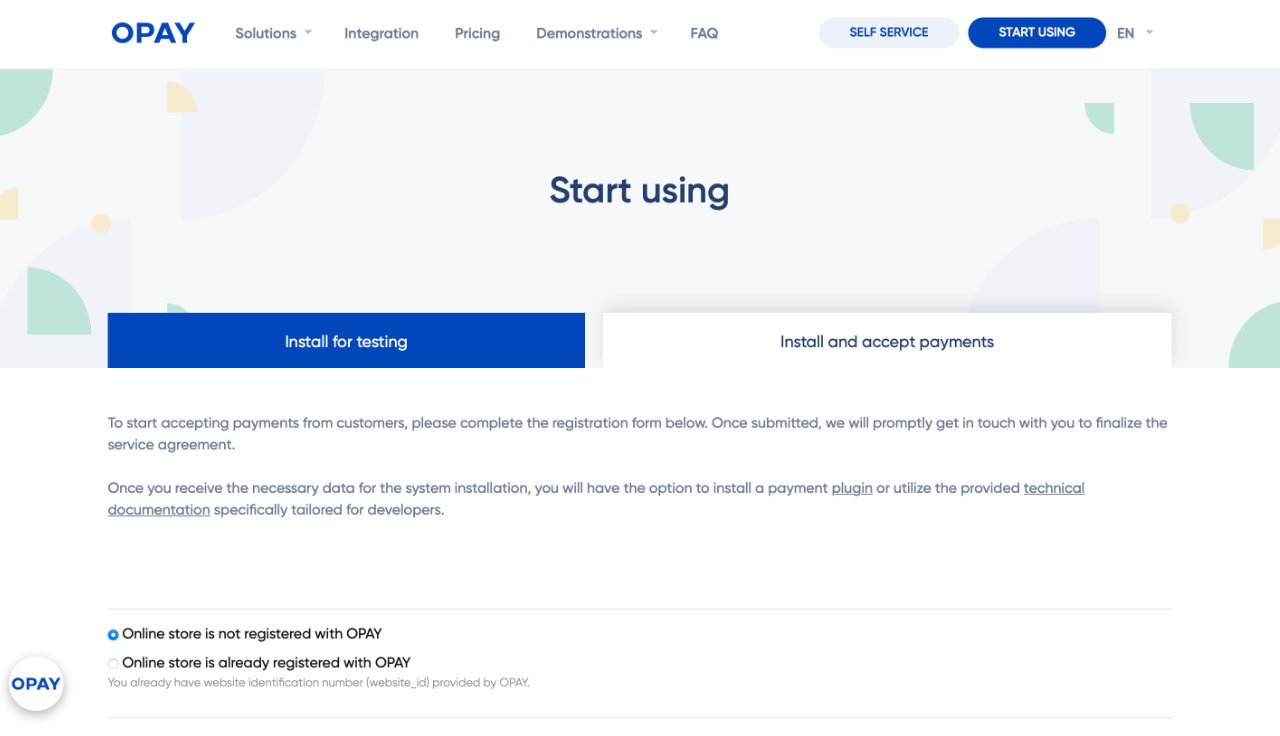
- Open the Start using registration form on the opay.eu website.
-
On the opened page, select Install and Accept Payments option.

- Please fill out the form.
-
Please click on the "Submit Data" button.

-
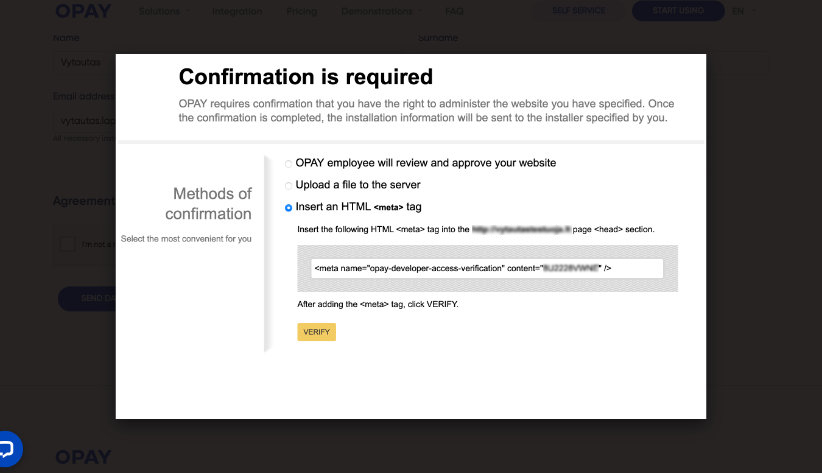
In the popup window titled "Confirmation is required", select "Upload HTML tag" and copy the entire entry.
Please keep the window open and refrain from clicking on anything else for now.
-
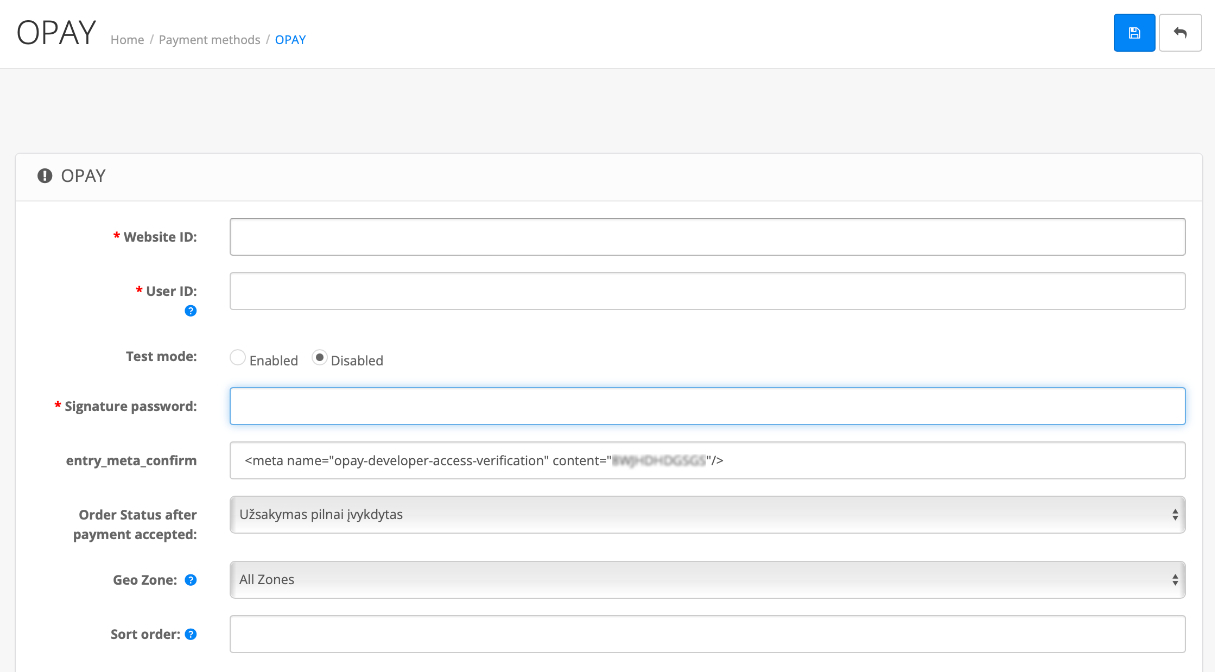
In your browser, open a new tab or window and go to your store's administrative panel. Go to Settings > Payment Methods and find the OPAY module.
If the payment method has not been used before, activate it by clicking on the green button with a plus symbol. To manage the payment method, click on the blue edit button with a pencil symbol.
-
Paste the ownership verification code obtained in the previous step into the Project Ownership Verification Code field. Click on the Save button (a blue button with a disk symbol) located at the top of the admin panel. Once this step is completed, return to the tab or window with the OPAY verification message. Click on the Verify button. If the code has been added correctly and the store's address matches the one you provided during the registration process, you will receive a successful verification message on the OPAY website. Further installation instructions will be sent to your email inbox.

After reviewing the data you provided, we will contact you by phone or email to proceed with the signing of the contract.
If you have any questions or encounter any difficulties, please contact us by phone +370 611 55554 or email at [email protected].
Activation
In the email, you will find the following information:
Website Identification Number (website_id):
User Identification Number (user_id):
Signature Password
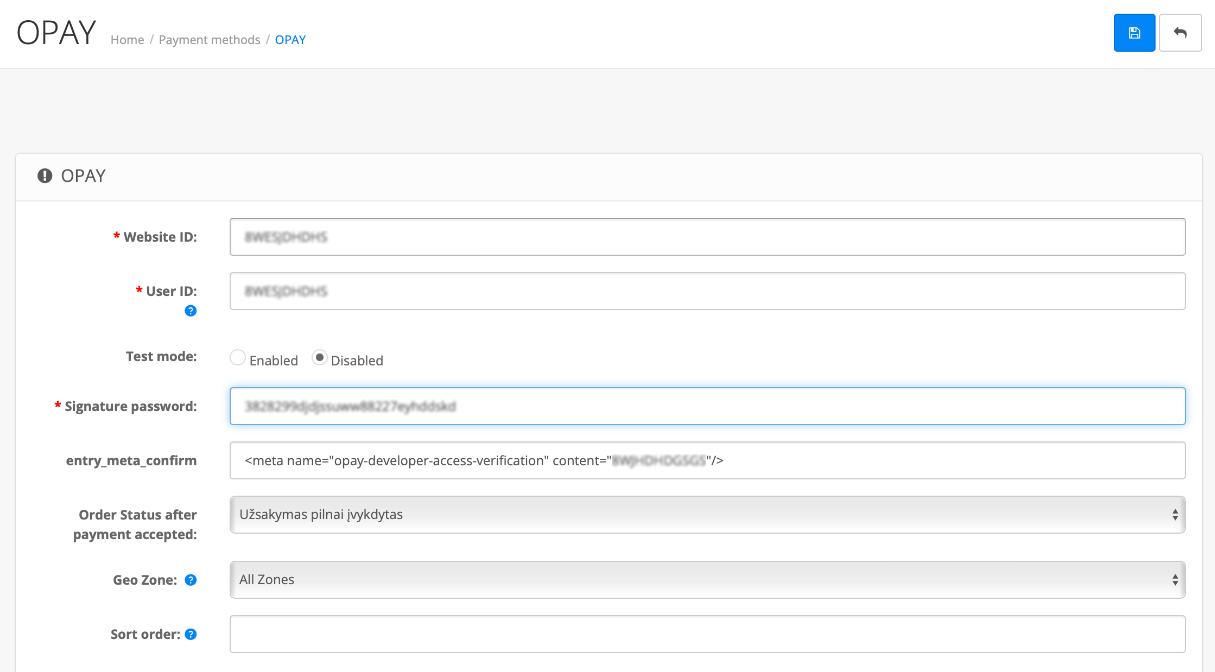
You will need to enter these corresponding details into the OPAY payment method management module.
To access it, go to your store's admin panel Settings > Payment Methods > OPAY. Click on the
blue Edit button with a pencil symbol. In the field that appears, you will see fields with
the same
names mentioned above. Fill in the information received via email into those fields.

Until the OPAY agreement is signed, it is essential to keep the Testing mode enabled.
Other fields of the OPAY management module
- In the Order Status after Payment Confirmation field, you can choose the color and labels to mark orders when your customers successfully make payment on the OPAY platform. You can use one of the standard statuses or create a completely new one. For easier identification of orders, you can name the status uniquely, such as Paid via OPAY or similar. For more information, please refer to Localization > Order Statuses.
- In the Geographical Zone field, you can select specific countries from which you want to accept payments through the OPAY plugin. By default, you can ignore this field or choose the geographical zone All Lithuania. As your business expands and you become more familiar with the operation of your store, you can change the value of this field. For more information about geographical zones, please read about Localization > Countries, Cities, Geographical Zones.
- In the Priority field, you can specify the display order of OPAY payment methods (within the overall block) compared to other payment methods used in your store. For example, if you want OPAY payment methods to be listed first in the checkout page, you can leave this field blank, enter "1", "0", or any number smaller than the priorities assigned to other payment methods. For example, set the priority of OPAY to 1 and other payment methods to 2.
- In the Payment Method is field, don't forget to check the Enabled box, otherwise the option to pay through OPAY won’t be visible. After filling in the values, remember to save the entire control module using the blue floppy disk symbol at the top.
- It is important to note that when you install any new payment method in your store, you need to assign it to shipping methods. This means that for certain shipping options, you may not allow specific payment methods. For example, if a customer chooses courier delivery, you may only allow payment to the courier. If a customer wants to receive the goods at a pickup point, you may not want to show the payment method for courier delivery.
- In the admin panel, go to Settings > Integration Settings > Payment and Shipping Method Dependencies. Click on Edit to modify the settings. For all desired shipping methods,check the checkbox next to the OPAY payment method to show it when the corresponding shipping method is selected. Save the changes. For more information about payment and shipping methods, please refer to Settings > Integration Settings > Payment and Shipping Method Dependencies.
If you have any questions or encounter any difficulties, please call +370 611 55554 or email [email protected]
Payment page customization
Customizing the payment page to match your brand’s style can significantly enhance the customer experience. We highly recommend doing so, as a branded payment page builds trust, strengthens the sense of security, and helps reduce cart abandonment.
Customization is quick and easy via the Payment Pages menu in the OPAY self-service portal. You can choose between two design styles, apply your brand color, upload a logo, and preview changes instantly.