Joomla! - VirtueMart plugin
Seamlessly integrate the OPAY payment system with Joomla! - VirtueMart store by following the Installation guide bellow.
Plugin version (v1.2.5)
Tested with VirtueMart versions:
2.6.x - 3.8.9
Before you start
Before installing the OPAY payment system on your website, please ensure that the registration form on the OPAY website has been completed. If you have not registered yet, please do so first. After registration, you will receive the necessary credentials via email (Website ID, Signature Password, and User ID), which are required to proceed with the system integration.
Installation instructions
-
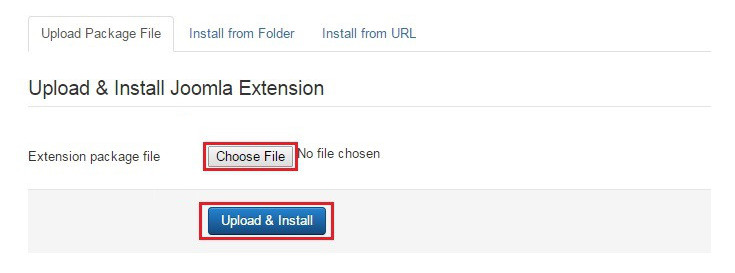
In the Joomla admin panel, go to Extensions -> Manage in order to install the OPAY VirtueMart plugin.
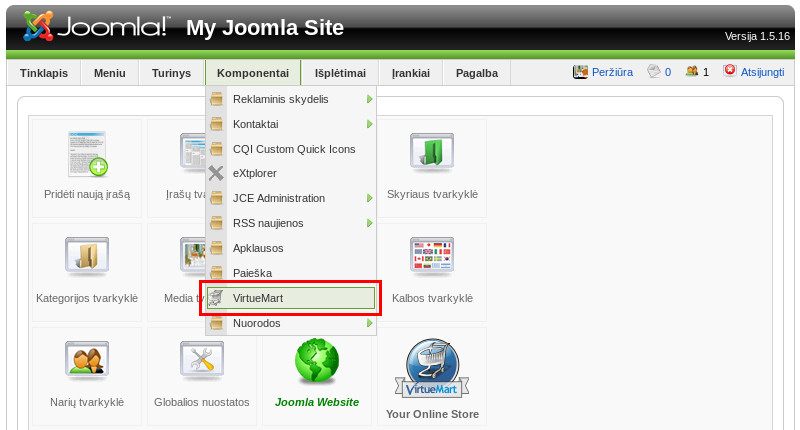
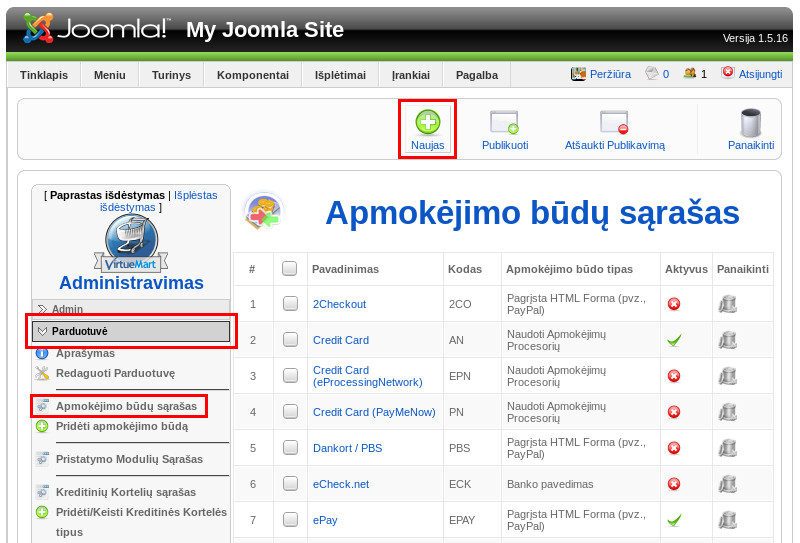
- Create a new VirtueMart payment method:
- Go to Components -> VirtueMart -> Payment Methods and click on New.
- In the Payment Name field, enter OPAY.
- Check the Published checkbox to mark it as Yes.
-
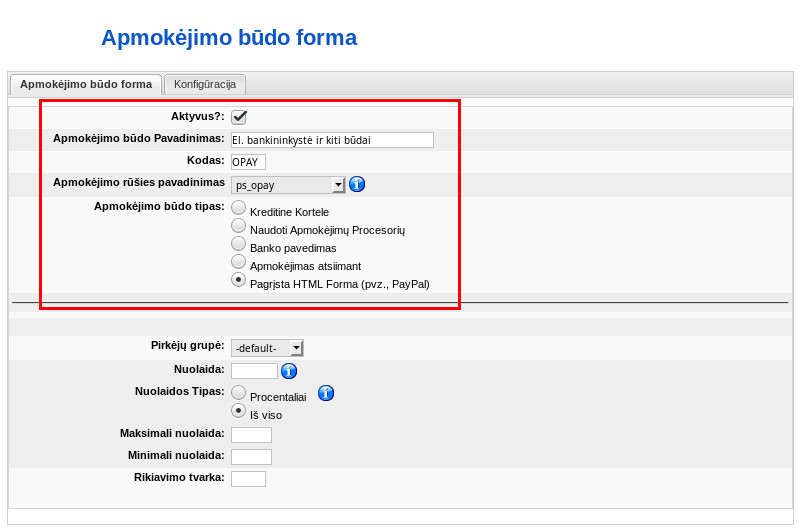
In the Payment Method field, select VM Payment - OPAY.
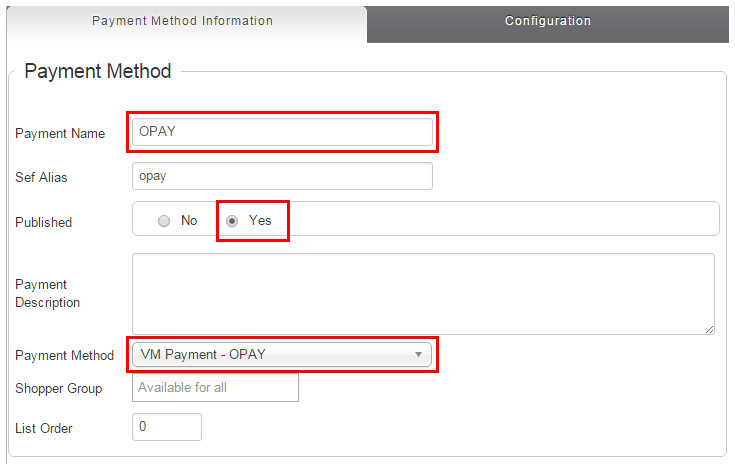
- Save the payment method by clicking on Save and proceed to the Configuration section of the payment method.
-
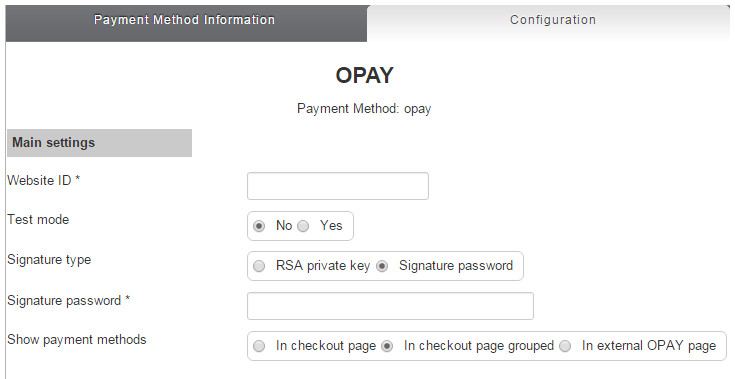
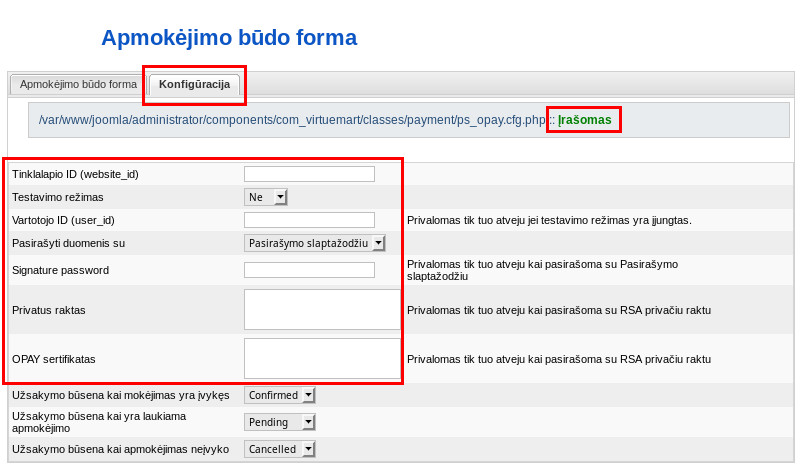
Fill in the mandatory fields under Main Settings and Save the payment method again. If your online store is not registered with the OPAY system, fill out the registration form to receive all the necessary configuration data.
- Accept payments!
Payment page customization
Customizing the payment page to match your brand’s style can significantly enhance the customer experience. We highly recommend doing so, as a branded payment page builds trust, strengthens the sense of security, and helps reduce cart abandonment.
Customization is quick and easy via the Payment Pages menu in the OPAY self-service portal. You can choose between two design styles, apply your brand color, upload a logo, and preview changes instantly.